


Design Systems
Design Systems give Reflex Build reusable visual guidelines for every app in a project. Define colors, typography, spacing, component styles, and other brand rules once, then let the agent apply them as it creates and updates your apps.
Open Design Systems
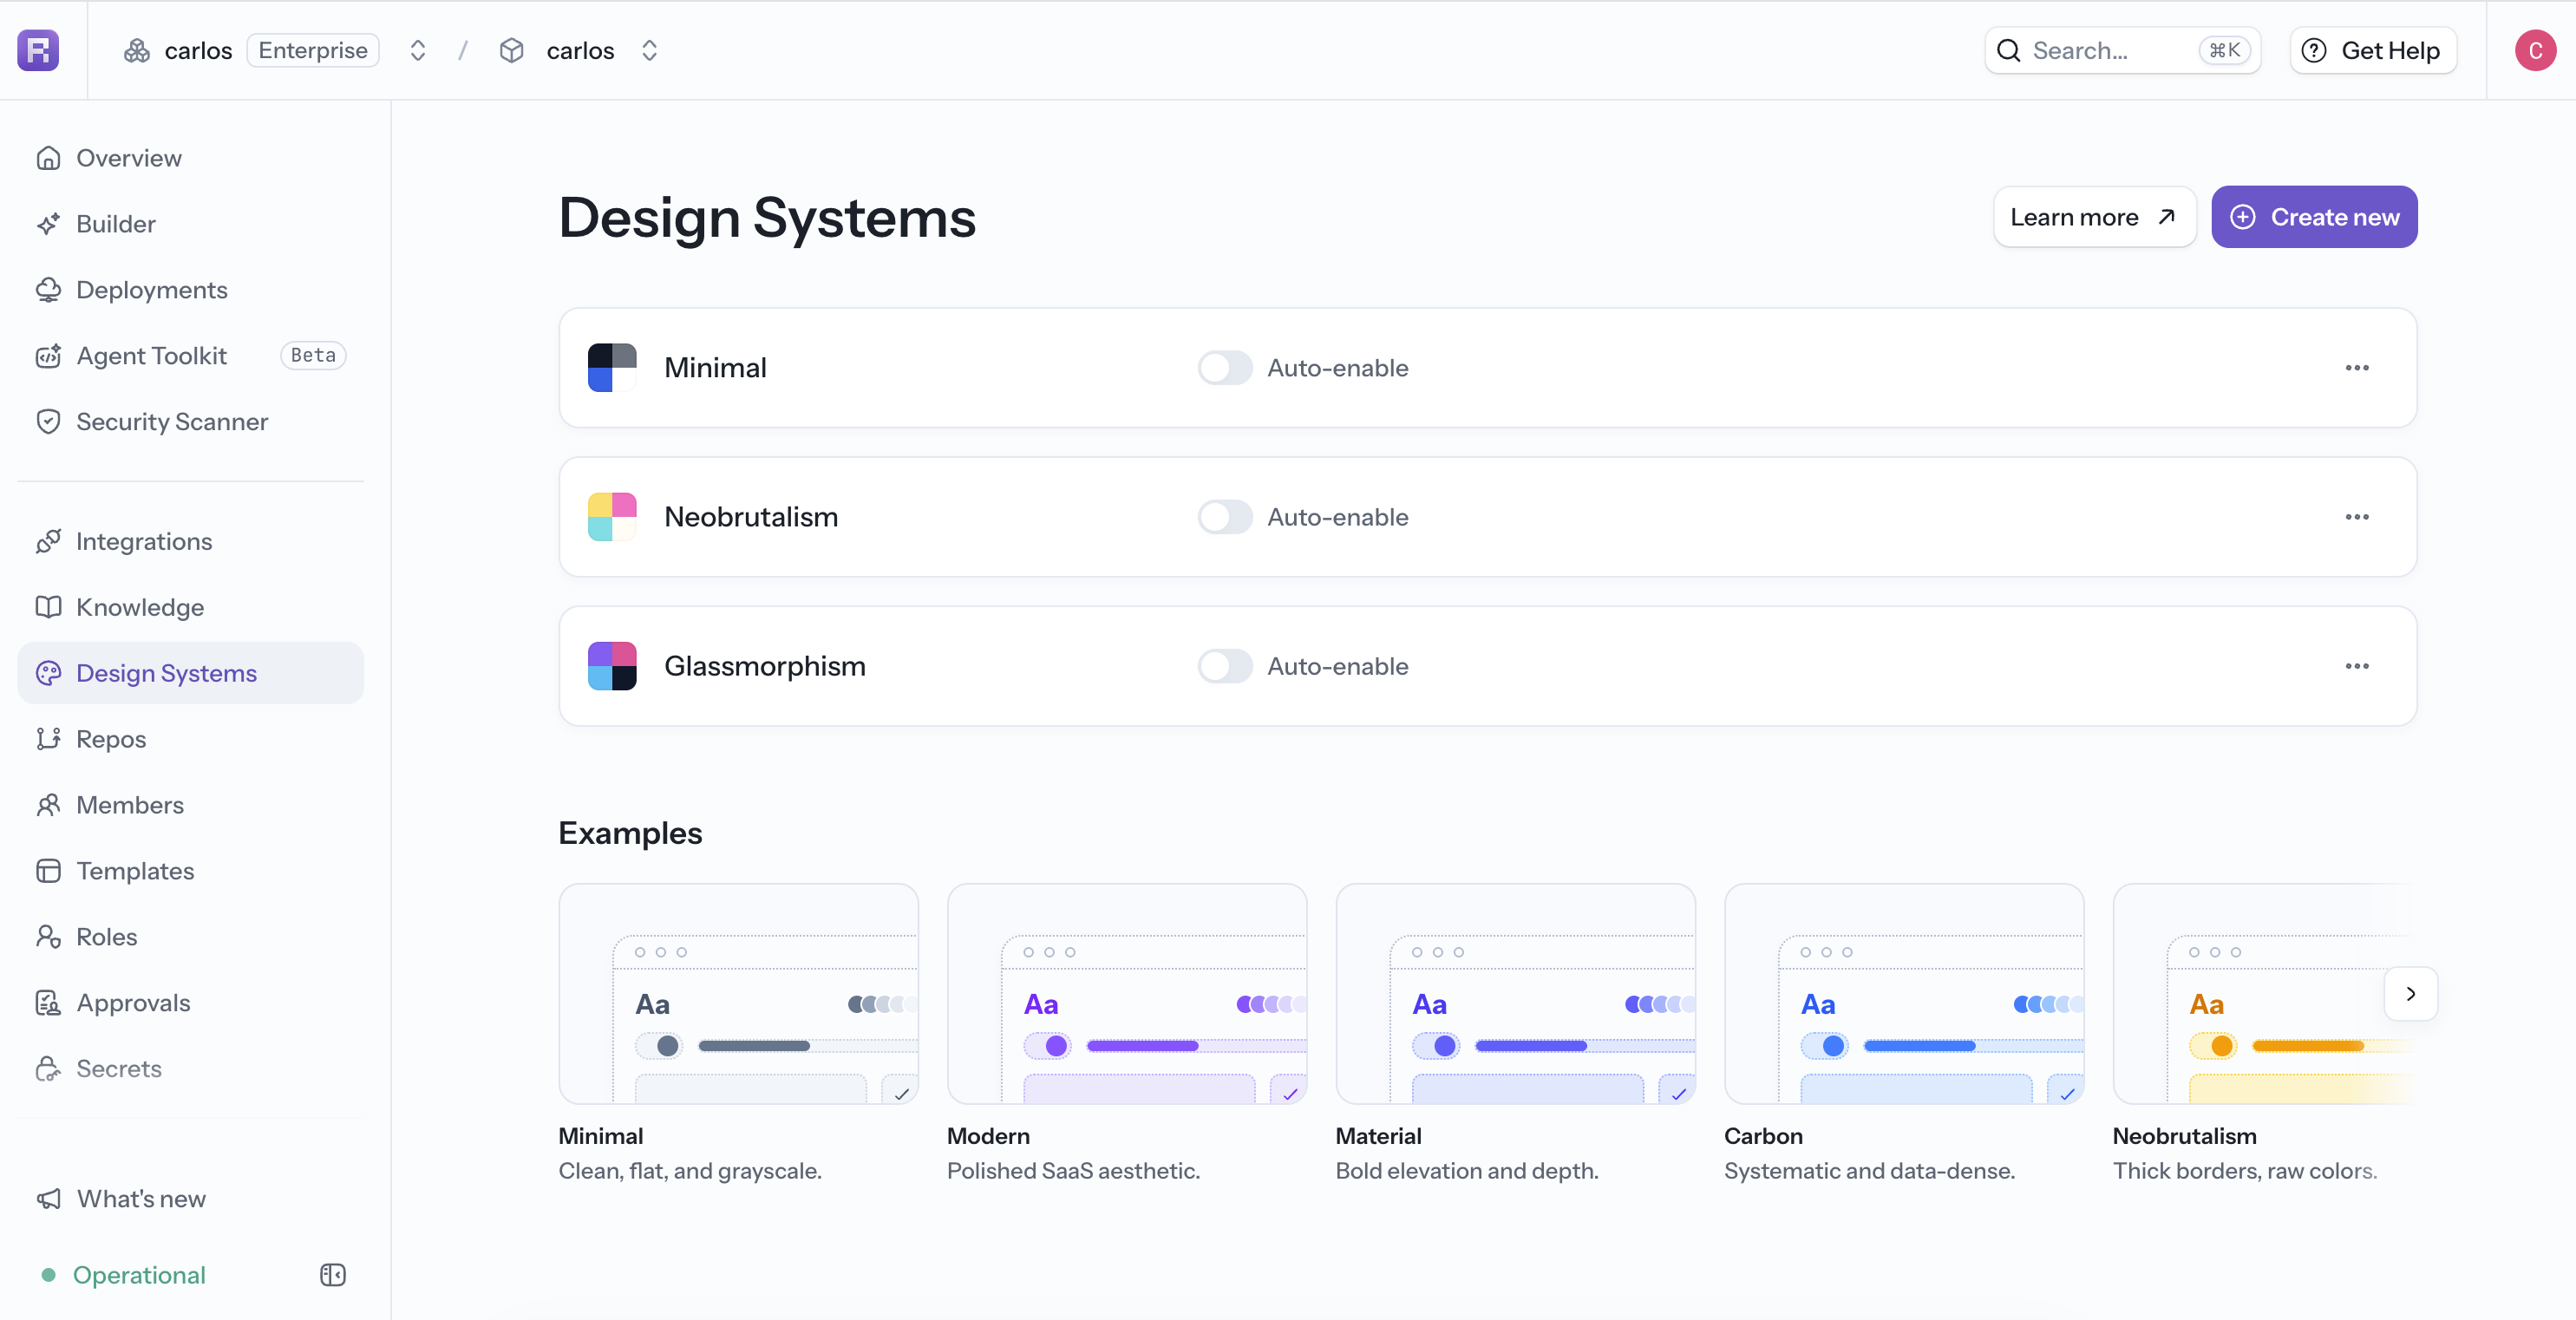
You can access Design Systems in two places:
- In your project, select Design Systems in the sidebar to create and manage the project's design systems.
- In the new-app prompt box, open the Design System selector to choose an existing design system or create one without leaving the builder.
Design systems belong to the project, so every app in that project can reuse them.
Create a Design System
From Design Systems in the project sidebar, select Create new. Enter a name and provide at least one source for the design:
- Guidelines: Describe the visual direction in plain language.
- Reference website: Enter a public website URL. Reflex captures a screenshot of the page and uses its visual language as a reference.
- Reference file: Upload a PDF or image containing a brand guide, style guide, screenshot, or mockup.
You can combine written guidelines with a website or uploaded file. Select Generate to create and save the design system. The new design system becomes active automatically.
For example:
Use a warm, editorial style with cream backgrounds, dark green text,
serif headings, compact navigation, and orange accents for primary actions.
Keep cards flat with thin borders and use generous spacing between sections.
Supported Reference Files
Reflex accepts one reference file up to 20 MB in any of these formats:
- PNG
- JPG or JPEG
- WebP
Start From an Example
The Examples section includes ready-made design systems such as Minimal, Modern, Material, Carbon, Neobrutalism, and Glassmorphism. Select Add Style on an example to add it to the project and make it active.
Examples are useful as a starting point. After adding one, edit its saved Markdown instructions to match your brand more closely.
Select the Active Design System
Enable Auto-enable next to a saved design system to make it active for subsequent Reflex Build requests in the project. You can also select or create a design system from the new-app prompt box before generating an app.
Only one design system can be active at a time. Activating, creating, or adding another design system automatically deactivates the current one. Turn off the active design system if you want to build without design-system guidance.
The active design system also guides later updates to the project's apps. You can still provide page-specific requirements in your prompt:
Use the active design system, but make this checkout page more compact
and reserve the accent color for the final purchase action.
Edit or Delete a Design System
From Design Systems in the project sidebar, open the menu next to a saved design system.
- Select Edit to change its name or update the Markdown instructions that the agent follows.
- Select Delete to remove it from the project.
Editing the Markdown is useful when you need exact tokens or component rules:
## Buttons

- Primary buttons use `#0F62FE` with white text.
- Use a 4 px corner radius.
- Button labels use 14 px semibold text.
- Destructive actions use `#DA1E28`.
Best Practices
- Give each design system a descriptive name, such as
Marketing SiteorInternal Admin Tools. - Describe concrete choices such as colors, typefaces, spacing, borders, and component behavior instead of asking for a design that is only "modern" or "clean."
- Use a public, visually representative page when supplying a reference website.
- Upload a focused brand guide or screenshot that clearly shows the styles you want the agent to reproduce.
- Review the saved Markdown and add any non-negotiable accessibility or brand requirements.
- Keep one design system active while building a consistent group of apps, and switch it when the project needs a different visual direction.